
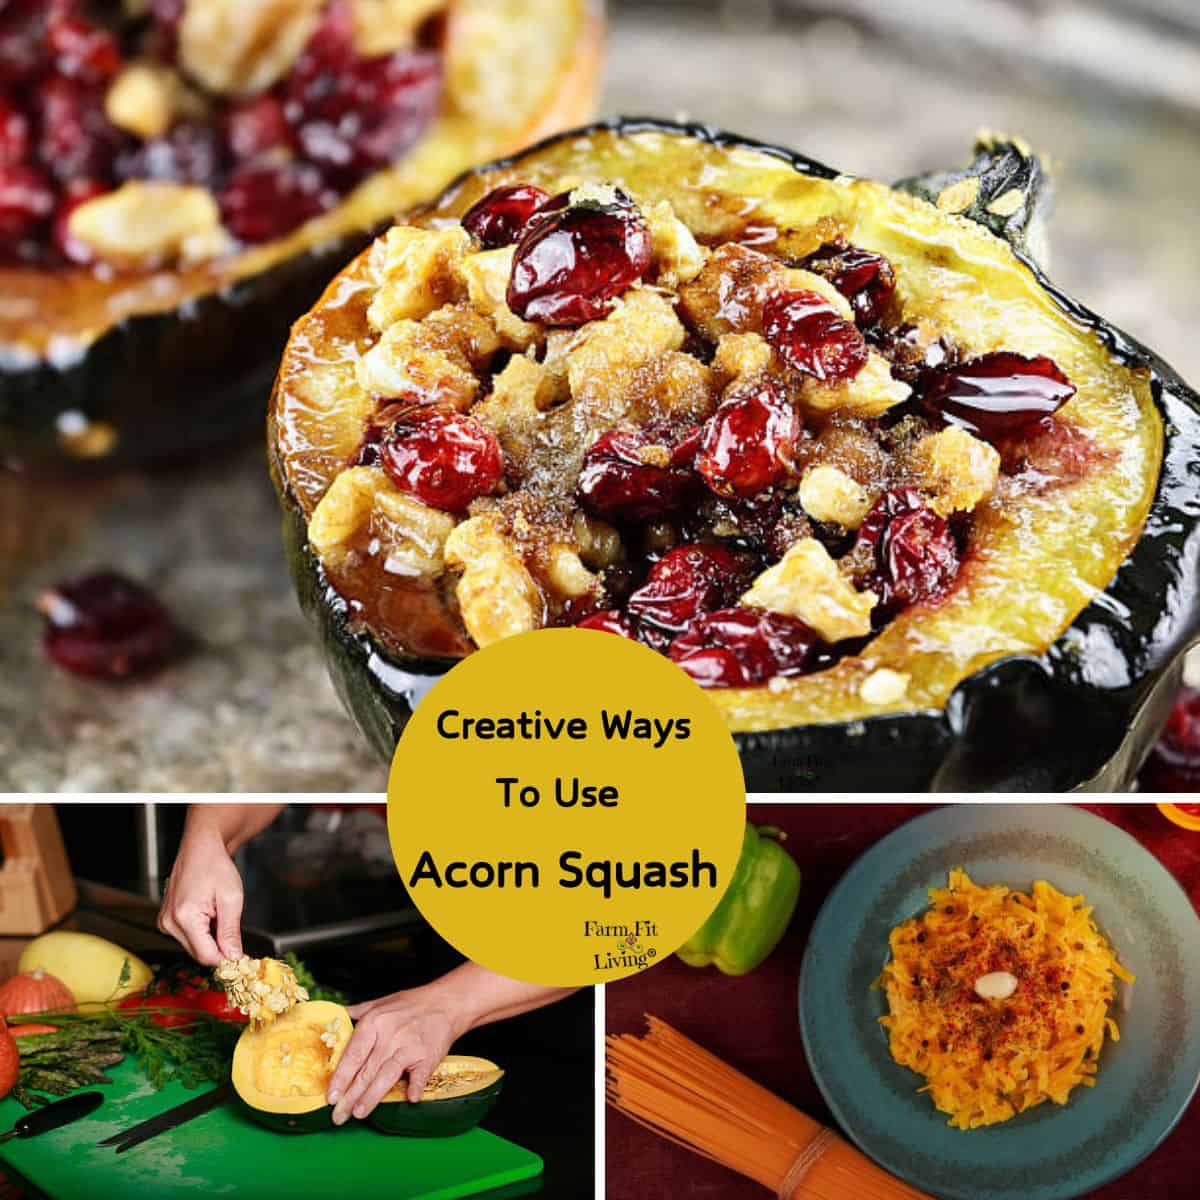
Creative Ways to Use Acorn Squash Beyond the Basics

Acorn squash sits on your counter looking beautiful but intimidating. Keep reading for many favorite ways to use acorn squash that aren't scary.
You bought an acorn squash with good intentions, but now it sits untouched because you have no idea what to do with it. The hard skin seems impossible to cut, and you are unsure how to bring out its best flavors. But you have came to the right place. There are many ways to use acorn squash and I'm excited to share them with you all in this one post.
You know it is healthy and delicious, yet you keep reaching for easier vegetables. This guide walks you through everything from selecting the perfect squash to mastering cooking techniques that bring out its naturally sweet flavor. By the end, you will have the confidence to make acorn squash a regular part of your meal rotation.
What makes acorn squash one of the most versatile vegetables in your kitchen? This dark green winter squash can be roasted, stuffed, pureed, or grilled to create everything from savory dinners to sweet desserts. Whether you are a beginner or experienced cook, this comprehensive guide provides techniques and recipes that work. Get ready to discover why acorn squash deserves a permanent spot in your cooking routine.
Acorn squash is a nutritional powerhouse.
You will discover how to select, store, prep, and cook acorn squash using methods that guarantee perfect results. From classic roasted halves to innovative stuffed variations, these techniques and recipes make cooking acorn squash simple and satisfying. Let's start with selecting the best acorn squash for any acorn squash recipe.
This post contains Affiliate Links. This means if you click and buy, I might make a commission at no cost to you.
See my policy for more information
SELECTING THE PERFECT ACORN SQUASH
Finding the right acorn squash at the store or farmers market sets the foundation for delicious results. Look for squash that feels heavy for its size, which indicates good moisture content and ripe flesh inside. The exterior should be hard and free from soft spots, cuts, or bruises that could signal decay.
Visual Indicators of Quality
Color provides important clues about ripeness and flavor. A deep green color with distinct ribbing is ideal, though some orange patches are perfectly normal and do not affect taste. Avoid squash with extensive orange coloring covering more than 50% of the surface, as this may indicate the squash is overripe. The stem should be dry, corky, and firmly attached rather than green or missing entirely.
Size matters when planning your meals. Most acorn squash weighs between one and three pounds, with medium-sized squash (around 1.5 to 2 pounds) offering the best balance of flavor and texture. Smaller squash can be more tender but may lack the sweet, nutty flavor that develops in slightly larger specimens.
Avoid these Mistakes
• Choosing squash with shiny skin instead of matte finish. A shiny appearance often means the squash was picked too early and will lack sweetness and proper texture when cooked.
• Ignoring the weight test when comparing similar-sized squash. A lighter squash has likely lost moisture and will produce dry, stringy flesh that lacks flavor.
• Buying squash with green or moist stems thinking they are fresher. Green stems indicate the squash was harvested prematurely and needs more time to develop its full flavor profile.
PROPER STORAGE TECHNIQUES
Acorn squash stores exceptionally well when you follow the right methods, allowing you to enjoy this fall vegetable for months. Whole, uncut squash keeps best in a cool, dark, dry location with good air circulation. A pantry, basement, or garage works perfectly if temperatures stay between 50 and 60 degrees Fahrenheit.
Never refrigerate whole acorn squash because cold temperatures cause the flesh to deteriorate faster and develop an unpleasant texture. Room temperature storage works fine for short periods up to two weeks, but cooler conditions extend shelf life significantly. Check stored squash weekly for any signs of soft spots or decay, removing any affected squash immediately to prevent spreading.
After Cutting Storage Guidelines
Here is how storage duration changes based on the form of your acorn squash:
| Storage Form | Location | Duration |
| Whole Squash | Cool, Dark Place | 1 to 3 Months |
| Cut Raw Pieces | Refrigerator | 4 to 5 Days |
| Cooked Squash | Refrigerator | 3 to 5 Days |
| Frozen Cooked | Freezer | 10 to 12 Months |
Once you cut into an acorn squash, wrap the unused portion tightly in plastic wrap or place it in an airtight container before refrigerating. Remove the seeds first to prevent premature spoilage. The cut surface may darken slightly, but this is normal oxidation and does not affect safety or taste.
Mistakes to Avoid
• Storing whole squash in the refrigerator where cold damages the flesh. This accelerates deterioration and creates a watery, unpleasant texture that ruins recipes.
• Leaving seeds in cut squash pieces during refrigeration. The seeds and surrounding fibers harbor moisture and bacteria that quickly spoil the flesh.
• Freezing raw acorn squash without cooking it first. Raw frozen squash becomes mushy and loses its texture completely when thawed, making it unusable in most recipes.
ESSENTIAL PREP AND CUTTING TECHNIQUES
Cutting acorn squash safely requires the right approach because the hard skin and round shape can make it challenging. Start by washing the exterior thoroughly under running water to remove dirt and any residual pesticides. Dry the squash completely so your knife does not slip during cutting.
The Microwave Softening Method
Pierce the whole squash 8 to 10 times with a knife tip or fork, then microwave it on high for 2 to 3 minutes. This brief heating softens the skin just enough to make cutting significantly easier without actually cooking the flesh. Let it cool for a minute before handling.
Place the squash on a stable cutting board with a damp towel underneath to prevent sliding. Use a large, sharp chef's knife to cut from stem to bottom, rocking the knife through rather than pressing straight down. Apply steady pressure and let the knife do the work rather than forcing it through.
For recipes requiring cubes or slices, cut the halves into smaller wedges first. Place each wedge flat-side down on your cutting board for stability, then slice away the skin in downward strokes. Cut the peeled flesh into your desired shape, keeping pieces uniform in size for even cooking.
Alternative Cutting Approaches
• Cutting into rings creates beautiful presentations. Slice the whole squash crosswise into 1-inch thick rounds, then scoop out the seeds from each ring's center.
• Leaving the skin on for roasted halves saves prep time. The skin becomes tender when roasted and holds the flesh together beautifully for stuffed preparations.
• Using a vegetable peeler on quartered pieces removes skin efficiently. This works best after the squash has been microwaved briefly to soften the exterior.
Mistakes to Avoid
• Attempting to cut a cold, hard squash without softening it first. This increases injury risk significantly and often results in uneven cuts that affect cooking consistency.
• Cutting toward your body or hand instead of away from yourself. Always position your hands behind the knife blade and cut in a direction that keeps fingers safe.
• Using a dull knife because you think it is safer. Dull blades require more pressure and are more likely to slip, while sharp knives cut cleanly with less force required.
ROASTING ACORN SQUASH TO PERFECTION
Roasting brings out the natural sweetness in acorn squash and creates a tender, caramelized interior. This method is the most popular way to prepare acorn squash because it requires minimal effort and delivers consistently delicious results.
Preheat your oven to 400 degrees Fahrenheit for standard roasting. Cut the squash in half lengthwise and scoop out the seeds and stringy fibers with a spoon. Place the halves cut-side up on a baking sheet lined with parchment paper or aluminum foil.
Brush or drizzle the cut surfaces with olive oil, melted butter, or coconut oil. Season with salt and pepper at minimum, though you can customize flavors based on whether you want sweet or savory results. Flip the halves cut-side down on the baking sheet for the most evenly caramelized texture.
Timing and Temperature Guidelines
Roast for 35 to 45 minutes depending on the size of your squash halves. The squash is done when a fork pierces the flesh easily and the edges have caramelized to a golden brown. Smaller halves cook faster, while larger ones may need up to 50 minutes.
For faster cooking, increase the oven temperature to 425 degrees Fahrenheit and reduce the time to 30 to 40 minutes. Higher heat creates more caramelization on the edges but requires closer monitoring to prevent burning. Lower temperatures around 375 degrees work well if you are cooking other dishes simultaneously, though you will need to add 10 to 15 minutes to the cooking time.
Sweet and Savory Seasoning Combinations
Try these flavor profiles to match your meal:
• Classic Maple Butter. Combine 2 tablespoons melted butter with 2 tablespoons maple syrup, plus a pinch of cinnamon and nutmeg for a traditional sweet preparation that pairs well with pork or chicken.
• Savory Herb Blend. Mix olive oil with minced garlic, fresh thyme, rosemary, salt, and black pepper for a side dish that complements any protein.
• Brown Sugar Pecan. Brush with butter and sprinkle with brown sugar and chopped pecans during the last 10 minutes of roasting for a dessert-like treatment.
• Spicy Harissa. Blend harissa paste with olive oil and a squeeze of lemon juice for a North African-inspired preparation with heat and depth.
Avoid These Mistakes
• Roasting cut-side up for the entire cooking time without flipping. This prevents proper caramelization and leaves you with steamed rather than roasted squash that lacks depth of flavor.
• Overcrowding the baking sheet with multiple squash halves touching each other. This traps steam and prevents the browning that makes roasted squash special.
• Skipping the oil entirely in an attempt to reduce calories. Fat is essential for caramelization and helps seasonings adhere while preventing the flesh from drying out during roasting.
STUFFING SQUASH FOR COMPLETE MEALS
Stuffed acorn squash turns this vegetable into an impressive main course that works for weeknight dinners or special occasions. The natural bowl shape of halved squash makes it perfect for holding savory fillings.
Start with roasted squash halves that have been cooked until just tender, following the roasting method but reducing the time to 25 to 30 minutes. You want the flesh cooked about 80% through since it will finish cooking with the filling inside. Scoop out a small amount of the cooked flesh to create a deeper cavity, leaving about half an inch of flesh attached to the skin.
Protein-Based Filling Options
Ground meat fillings create hearty, satisfying meals. Brown one pound of ground beef, turkey, pork, or sausage in a skillet with diced onions and garlic. Add cooked rice or quinoa, vegetables like mushrooms or spinach, and seasonings. Mix in the scooped squash flesh, then pile the mixture into each half.
Vegetarian fillings work equally well and often incorporate the scooped squash flesh for added nutrition. Combine cooked wild rice with dried cranberries, toasted walnuts, sauteed celery and onions, fresh herbs, and vegetable broth. The contrast between sweet squash and savory filling creates complex, interesting flavors.
For a breakfast twist, fill roasted halves with scrambled eggs, crumbled breakfast sausage, shredded cheese, and diced bell peppers. Bake until the cheese melts and the eggs set completely.
Final Baking Process
Return filled squash halves to the oven at 375 degrees Fahrenheit. Bake for 15 to 25 minutes until the filling is heated through and any cheese has melted. Cover loosely with foil if the tops brown too quickly. The edges of the squash should be very tender and easily pierced with a fork.
Popular Stuffing Combinations
• Italian Sausage and Kale. Mix cooked Italian sausage with sauteed kale, sun-dried tomatoes, parmesan cheese, and breadcrumbs for a Mediterranean-inspired meal that feels restaurant-quality.
• Quinoa and Black Bean. Combine cooked quinoa with black beans, corn, diced tomatoes, cumin, chili powder, and shredded cheddar for a Southwestern vegetarian option.
• Apple and Sage Stuffing. Use traditional bread stuffing mixed with diced apples, dried cranberries, celery, onions, and fresh sage for a Thanksgiving-worthy side dish.
Mistakes to Avoid
• Fully cooking the squash before adding the filling and returning it to the oven. This results in mushy, overcooked squash that falls apart and loses its structural integrity.
• Filling the squash while both the squash and filling are cold. Room temperature or warm components ensure everything heats through evenly during the final baking stage.
• Using fillings that are too wet or have excess liquid. This makes the squash soggy and causes the filling to spill out during baking instead of staying contained in the cavity.
MAKING SQUASH SOUP
Pureed acorn squash creates velvety, comforting soups perfect for cool weather. The naturally sweet flavor pairs well with both cream-based and broth-based preparations.
Roast the squash halves cut-side down until very soft and caramelized, which intensifies the flavor. Once cool enough to handle, scoop out all the flesh and discard the skin. You can also peel and cube the squash before roasting it on a sheet pan, which speeds up cooking time. Here's a simple recipe to get you started with one of my favorite fall recipes.
Building the Soup Base
Saute diced onions in butter or olive oil until translucent and fragrant. Add minced garlic, a diced apple for sweetness, and warming spices like cinnamon, nutmeg, or curry powder depending on your flavor direction. Cook for 2 to 3 minutes until aromatic.
Add the roasted squash flesh to the pot along with vegetable or chicken broth. The ratio should be about 3 cups of squash to 4 cups of liquid, though you can adjust for your preferred consistency. Bring to a boil, then reduce heat and simmer for 15 to 20 minutes to let the flavors meld.
Use an immersion blender to puree directly in the pot, or carefully transfer to a standard blender in batches. Blend until completely smooth with no lumps remaining. For extra richness, stir in heavy cream, coconut milk, or a dollop of Greek yogurt after blending.
The finished soup should coat the back of a spoon but still pour easily. Thin with additional broth if too thick, or simmer uncovered to reduce if too thin. Taste and adjust seasoning with salt, pepper, and a squeeze of lemon juice to brighten the flavors.
Garnish and Serving Ideas
These toppings add texture and visual appeal:
• Toasted pepitas (pumpkin seeds) provide crunch and a nutty flavor that complements the sweet squash base perfectly.
• A swirl of cream or creme fraiche creates an elegant presentation and adds richness to each spoonful.
• Crispy fried sage leaves bring an earthy, aromatic element that elevates the soup from simple to sophisticated.
• Crumbled bacon or pancetta adds a smoky, salty contrast that balances the natural sweetness of the squash.
Mistakes to Avoid
• Blending hot soup at high speed in a standard blender without removing the center cap. Pressure builds and can cause the lid to blow off, creating dangerous burns from splattering soup.
• Adding cream before blending the soup completely smooth. This wastes expensive cream that gets trapped in the blender rather than in the final soup.
• Under-seasoning the soup because you think the squash is flavorful enough. Acorn squash needs adequate salt and acid to bring out its best qualities and prevent blandness.
GRILLING ACORN SQUASH
Grilled acorn squash develops a smoky char that adds complexity to its naturally sweet flavor. This method works beautifully during warmer months when you want to keep the kitchen cool.
Slice the squash into half-inch thick rings or wedges rather than halving it. Thinner pieces cook through before burning on the outside. Scoop out the seeds from each ring if using that shape. Brush both sides generously with olive oil to prevent sticking and help seasonings adhere.
Grilling Technique
Preheat your grill to medium-high heat, around 400 to 450 degrees Fahrenheit. Clean and oil the grates thoroughly to minimize sticking. Place the squash slices directly on the grates and close the lid.
Grill for 4 to 6 minutes on the first side without moving them so they develop char marks. Flip carefully with a spatula and grill for another 4 to 6 minutes on the second side. The squash should be tender throughout and show defined grill marks on both sides.
For extra smoky flavor, add soaked wood chips to your grill during cooking. Applewood and hickory complement the squash's natural sweetness particularly well. Keep the grill lid closed as much as possible to trap the smoke around the squash.
Seasoning Options
• Balsamic Glaze. Brush the squash with balsamic vinegar mixed with honey during the last 2 minutes of grilling for a tangy-sweet finish that caramelizes beautifully.
• Chili Lime. Toss grilled squash with lime juice, chili powder, and cilantro for a bright, spicy side dish that pairs with grilled meats.
• Garlic Parmesan. Immediately after grilling, toss the hot squash with minced garlic, grated parmesan, and fresh parsley for an Italian-inspired treatment.
Mistakes to Avoid
• Cutting the squash pieces too thick thinking they will hold together better. Thick pieces char on the outside before the interior cooks through, leaving you with burned squash that is raw in the middle.
• Placing the squash on the grill without adequate oil on both the squash and the grates. This guarantees sticking and torn pieces when you try to flip them.
• Constantly flipping and moving the squash pieces around. Let them sit undisturbed to develop proper char marks and caramelization that add flavor.
USING ACORN SQUASH IN SALADS
Roasted acorn squash adds substance and seasonal flavor to both green salads and grain-based salads. The sweet, tender cubes contrast beautifully with crisp greens and crunchy toppings.
Cut the squash into three-quarter-inch cubes after peeling away the skin. Toss with olive oil, salt, and pepper, then roast at 425 degrees Fahrenheit for 20 to 25 minutes until golden and tender. Let the cubes cool to room temperature before adding to salads, or use them warm if you prefer a wilted green approach.
Complementary Salad Ingredients
Build balanced salads by combining the squash with contrasting textures and flavors:
| Component | Examples | Purpose |
| Greens | Arugula, Spinach, Kale | Provides freshness and base |
| Protein | Chicken, Chickpeas, Goat Cheese | Makes the salad a complete meal |
| Crunch | Pecans, Walnuts, Pepitas | Adds textural contrast |
| Sweetness | Dried Cranberries, Apple Slices | Complements squash flavor |
| Dressing | Maple Vinaigrette, Balsamic | Ties all elements together |
For grain-based salads, combine roasted squash cubes with cooked farro, quinoa, or wild rice. Add dried fruit, toasted nuts, fresh herbs, and a tangy vinaigrette. These salads work well for meal prep since the components hold up for several days without wilting.
Fall-Inspired Salad Combinations
• Harvest Salad. Toss arugula with roasted squash, candied pecans, crumbled blue cheese, dried cranberries, and apple cider vinaigrette for a classic autumn combination.
• Warm Grain Bowl. Layer warm farro with roasted squash, chickpeas, massaged kale, tahini dressing, and pomegranate seeds for a satisfying vegetarian meal.
• Spinach and Bacon. Combine baby spinach with warm roasted squash, crispy bacon, hard-boiled eggs, red onion, and honey mustard dressing for a hearty lunch option.
Mistakes to Avoid
• Adding hot roasted squash directly to delicate greens without cooling it first. The heat wilts the greens immediately and creates an unappetizing soggy texture throughout the salad.
• Cutting the squash cubes too small thinking they will cook faster. Tiny pieces shrivel up during roasting and disappear in the salad instead of providing substantial bites.
• Dressing the entire salad in advance when using roasted squash. The moisture from the dressing makes the squash soggy over time, so dress only what you will eat immediately.
PUREEING ACORN SQUASH FOR BAKING
Pureed acorn squash works beautifully in baked goods, adding moisture, natural sweetness, and nutritional value. You can substitute acorn squash puree for pumpkin puree in most recipes with excellent results.
Roast squash halves cut-side down at 400 degrees until very soft, about 40 to 50 minutes. Let cool until you can handle them comfortably, then scoop out all the flesh. Process the flesh in a food processor until completely smooth with no lumps or strings remaining.
Preparing Puree for Baking
Acorn squash contains more moisture than canned pumpkin, so you need to remove excess liquid for baking applications. Line a fine-mesh strainer with cheesecloth or a clean kitchen towel. Place the puree in the lined strainer over a bowl and refrigerate for several hours or overnight. The excess liquid will drip out, leaving you with a thick, concentrated puree.
One medium acorn squash yields approximately 1 to 1.5 cups of puree after straining. Make large batches when squash is in season and freeze the puree in 1-cup portions for convenient use throughout the year.
You can use this puree in muffins, quick breads, pancakes, brownies, and even pasta sauces. The mild flavor adapts well to both sweet and savory applications without overpowering other ingredients.
Recipe Applications
• Squash Bread. Replace the pumpkin in your favorite pumpkin bread recipe with strained acorn squash puree for a nearly identical result with a slightly more delicate flavor.
• Pasta Sauce. Stir puree into cream-based pasta sauces for added body and a subtle sweetness that balances savory elements like sage and parmesan.
• Pancakes and Waffles. Add quarter to half cup puree to your pancake or waffle batter along with warming spices for a special breakfast treat.
• Smoothies. Blend a few tablespoons of puree into fruit smoothies for extra fiber and vitamins without a strong squash flavor.
Mistakes to Avoid
• Using watery, unstrained puree in baked goods expecting the same results as canned pumpkin. The excess moisture throws off ratios and creates dense, gummy textures that never fully bake through.
• Processing the squash flesh while it is still hot from the oven. Hot puree splatters dangerously in the food processor and creates steam that makes the texture watery rather than thick.
• Freezing puree in large containers instead of portion-sized amounts. You have to thaw the entire batch even when you only need a cup, and refreezing compromised quality significantly.
MAKING ACORN SQUASH FRIES
Acorn squash fries offer a healthier alternative to potato fries while satisfying the same crispy, savory craving. They work as a side dish or snack that both kids and adults enjoy.
Peel the squash completely and cut it into fry-shaped pieces about half an inch thick and 3 to 4 inches long. Keeping the pieces uniform ensures even cooking. Soak the cut squash in cold water for 20 to 30 minutes to remove excess starch, then drain and pat completely dry with paper towels.
Achieving Maximum Crispiness
Toss the dried squash fries with cornstarch or arrowroot powder, which creates a crispy coating when baked. Use about 2 tablespoons of starch per squash. Add olive oil, salt, and your choice of seasonings, tossing until every piece is evenly coated.
Spread the fries in a single layer on a baking sheet lined with parchment paper, making sure no pieces touch. Overcrowding creates steam that prevents crisping. Bake at 425 degrees Fahrenheit for 25 to 30 minutes, flipping once halfway through cooking.
For extra crispy results, finish the fries under the broiler for 2 to 3 minutes, watching carefully to prevent burning. The edges should be golden brown and crispy while the interior remains tender.
Seasoning Combinations
Try these flavor profiles:
• Parmesan Herb. Toss hot fries with grated parmesan cheese, garlic powder, dried oregano, and fresh parsley for an Italian-inspired snack.
• Spicy Cajun. Coat with Cajun seasoning blend, paprika, and cayenne pepper for fries with a kick that pair well with ranch dressing.
• Cinnamon Sugar. Make sweet fries by tossing with cinnamon and coconut sugar, then serve with maple syrup for dipping.
• Curry Lime. Season with curry powder, a squeeze of lime juice, and salt for an unexpected flavor combination that is both savory and bright.
Mistakes to Avoid
• Skipping the drying step after soaking the squash pieces. Any moisture left on the surface creates steam during baking that makes fries soggy instead of crispy.
• Cutting the fries too thin thinking they will get crispier. Thin pieces shrivel up and burn before developing good texture, while slightly thicker pieces crisp on the outside and stay tender inside.
• Flipping the fries too frequently during baking. Let them sit undisturbed for the first 15 minutes so they develop a crust that releases easily from the pan when flipping.
STEAMING ACORN SQUASH
Steaming produces tender squash without the caramelization of roasting, making it ideal when you want a neutral base for other flavors. This method cooks faster than roasting and preserves more nutrients.
Cut the squash into quarters or smaller wedges, removing the seeds. You can leave the skin on since it softens during steaming and can be eaten or easily removed after cooking. Place the pieces in a steamer basket over 1 to 2 inches of boiling water.
Cover the pot with a tight-fitting lid and steam for 12 to 18 minutes depending on the size of your pieces. Check for doneness by piercing with a fork, which should slide in easily when the squash is ready. Smaller pieces cook faster, so check them at the 10-minute mark.
Using Steamed Squash
The plain, tender flesh works perfectly for mashing or pureeing. Scoop the flesh from the skin while it is still warm, then mash with butter, salt, pepper, and any seasonings you like. The texture resembles mashed sweet potatoes and pairs well with roasted meats.
Steamed squash also works in recipes where you want the squash flavor without added roasted notes. Use it in soups, baby food, or as a base for sauces where pure squash flavor is important.
Add steamed squash to pasta dishes by cutting it into bite-sized pieces and tossing with olive oil, garlic, and fresh herbs. The mild flavor absorbs the seasonings beautifully without competing with other ingredients.
Flavor Enhancements
• Brown Butter Sage. Heat butter until it browns and becomes nutty, add fresh sage leaves until crispy, then pour over mashed steamed squash for an elegant side dish.
• Garlic and Parmesan. Mash steamed squash with roasted garlic, grated parmesan, and cream for a luxurious alternative to mashed potatoes.
• Maple and Pecans. Fold maple syrup and toasted chopped pecans into mashed squash for a sweet side dish that works for holiday meals.
Mistakes to Avoid
• Letting the water level touch the bottom of the steamer basket. The squash should cook from steam only, not boiling water, which makes it waterlogged and bland.
• Removing the lid frequently to check on the squash. Each time you lift the lid, you release steam and add several minutes to the cooking time.
• Over-steaming until the squash becomes mushy and falls apart. Check early and often once you hit the 12-minute mark to catch it at peak tenderness.
INCORPORATING ACORN SQUASH IN PASTA DISHES
Acorn squash brings sweetness and substance to pasta preparations, working in both cream-based and oil-based sauces. The tender cubes or ribbons add color and nutrition to simple pasta dinners.
Roast small squash cubes until caramelized and tender, then toss with freshly cooked pasta, olive oil, garlic, and parmesan. This simple preparation lets the squash shine while the garlic and cheese add savory depth. Fresh sage or thyme brings an herbal note that complements the sweet squash perfectly.
Cream-Based Pasta Options
Create a luscious sauce by pureeing roasted squash with cream, butter, and parmesan cheese. Thin the mixture with pasta cooking water until it reaches a coating consistency. Toss with fettuccine or pappardelle, and top with crispy pancetta and toasted walnuts.
For a lighter cream sauce, combine squash puree with Greek yogurt or mascarpone instead of heavy cream. Add a splash of vegetable broth to thin it out, along with nutmeg and white pepper. This creates a sauce that feels indulgent without being heavy.
Stuffed pasta like ravioli or tortellini works beautifully with acorn squash. Mix pureed squash with ricotta, parmesan, and nutmeg for the filling. Serve with brown butter sage sauce or a simple tomato sauce.
Complete Pasta Meal Ideas
• Squash and Sausage Pasta. Combine roasted squash cubes with crumbled Italian sausage, sauteed onions, baby spinach, and orecchiette pasta in a white wine sauce.
• Vegetarian Squash Carbonara. Replace traditional carbonara's guanciale with roasted squash and add eggs, parmesan, and black pepper for a meatless version with similar richness.
• Baked Squash Pasta. Layer cooked ziti with squash puree sauce, mozzarella, and parmesan, then bake until bubbly for a comforting casserole-style dish.
Mistakes to Avoid
• Adding cold squash puree directly to hot pasta without tempering it first. The temperature shock causes the sauce to break and look curdled instead of smooth and creamy.
• Using too much squash puree without enough liquid to create a proper sauce. Thick, pasty mixtures cling to the pasta in clumps instead of coating each strand evenly.
• Forgetting to reserve pasta cooking water before draining. This starchy water is essential for adjusting sauce consistency and helping it adhere to the pasta properly.
PREPARING ACORN SQUASH CHIPS
Thinly sliced and baked acorn squash creates crispy chips that rival store-bought vegetable chips. These make excellent snacks or garnishes for soups and salads.
Use a mandoline or very sharp knife to slice the squash into paper-thin rounds, about one-eighth inch thick or less. A mandoline produces the most consistent results, which is important for even cooking. Remove the seeds from each slice.
Baking Process for Chips
Arrange the slices in a single layer on baking sheets lined with parchment paper. Do not overlap any pieces or they will stick together. Brush very lightly with oil using a pastry brush rather than tossing them, since too much oil makes the chips greasy rather than crispy.
Season with salt and any spices you like, keeping it simple so the squash flavor comes through. Bake at 250 degrees Fahrenheit for 1.5 to 2 hours, checking every 20 minutes and removing any chips that have crisped up. Thinner slices crisp faster than thicker ones.
The chips will still feel slightly soft when you first remove them from the oven but will crisp up completely as they cool. Store completely cooled chips in an airtight container with a small packet of silica gel or a few grains of rice to absorb any moisture.
Seasoning Ideas
• Sea Salt and Vinegar. Brush slices with white vinegar before baking and season generously with sea salt for a tangy, addictive chip.
• BBQ Spice. Dust with a mixture of paprika, garlic powder, onion powder, and brown sugar for chips with barbecue flavor.
• Everything Bagel. Sprinkle with everything bagel seasoning before baking for savory chips with complex flavor.
Mistakes to Avoid
• Slicing the squash too thick expecting them to still crisp up. Anything thicker than one-eighth inch will never get truly crispy and will remain leathery no matter how long you bake them.
• Using too high a temperature trying to speed up the process. High heat burns the edges before the centers dry out, leaving you with bitter, inedible chips.
• Storing chips before they cool completely. Warm chips release steam in the container that makes all the chips soggy within hours of storage.
USING ACORN SQUASH IN BREAKFAST DISHES
Acorn squash works surprisingly well in breakfast preparations, adding nutrition and subtle sweetness to the most important meal of the day. The versatile vegetable adapts to both sweet and savory breakfast styles.
Add roasted squash cubes to breakfast hash with potatoes, onions, peppers, and your choice of breakfast meat. The squash becomes tender and slightly sweet, contrasting nicely with savory sausage or bacon. Top with fried or poached eggs for a complete meal.
Sweet Breakfast Applications
Stir squash puree into oatmeal along with cinnamon, nutmeg, and maple syrup for a filling breakfast that tastes like pie. Top with toasted pecans and a dollop of Greek yogurt for added protein. The puree makes the oatmeal creamy and adds fiber without changing the texture noticeably.
Mix squash puree into pancake or waffle batter for extra moisture and nutrition. Add warm spices like cinnamon and ginger, and serve with butter and maple syrup. Kids often do not notice the added vegetable while parents appreciate the nutritional boost.
Create a breakfast bowl by layering Greek yogurt with squash puree, granola, nuts, and fresh fruit. The squash adds substance and makes the bowl more filling than yogurt alone.
Savory Breakfast Ideas
• Squash and Egg Scramble. Saute roasted squash cubes with onions and bell peppers, then add beaten eggs and scramble until just set for a veggie-packed breakfast.
• Breakfast Squash Bowls. Fill roasted squash halves with scrambled eggs, cheese, salsa, and avocado for a low-carb breakfast bowl that looks impressive.
• Savory Squash Muffins. Fold squash puree into a savory muffin batter with cheese, herbs, and bacon bits for grab-and-go breakfast options.
Mistakes to Avoid
• Adding too much squash puree to pancake batter trying to make them healthier. Excess puree makes pancakes heavy and dense instead of light and fluffy.
• Skipping the seasoning when using squash in savory breakfast dishes. Plain squash tastes bland and sweet, so it needs salt, pepper, and aromatics to work in savory applications.
• Using cold roasted squash in hot egg dishes without warming it first. Cold squash cools down the eggs too much and creates uneven cooking temperatures.
PRESERVING ACORN SQUASH BY FREEZING
Freezing allows you to enjoy acorn squash year-round when fresh squash is unavailable or expensive. Proper freezing techniques maintain quality and prevent freezer burn.
Always cook the squash before freezing since raw squash becomes mushy and unpalatable when thawed. Roast or steam until tender, then cool completely before freezing. You can freeze it in chunks, mashed, or as puree depending on how you plan to use it later.
Freezing Methods and Storage Times
For cubes or chunks, spread them in a single layer on a baking sheet and freeze until solid. Transfer the frozen pieces to freezer bags, removing as much air as possible. This prevents the pieces from freezing into one large clump and allows you to remove only what you need.
Freeze puree or mashed squash in measured portions using freezer-safe containers or bags. Flatten bags to freeze in thin sheets that thaw quickly and take up less freezer space. Label everything with the date and contents.
Properly frozen cooked squash maintains good quality for 10 to 12 months. After that, it remains safe to eat but may develop freezer burn or off flavors that affect quality. Use older frozen squash in soups or baked goods where texture matters less.
Thawing and Using Frozen Squash
Thaw frozen squash in the refrigerator overnight for the best texture. You can also thaw it in the microwave on the defrost setting if you need it quickly. For soups or sauces, you can add frozen puree directly to the pot without thawing.
Previously frozen squash works best in recipes where it will be pureed or incorporated into other dishes. The texture changes slightly during freezing, making it less ideal for dishes where you want distinct squash pieces with firm texture.
• Vacuum sealing frozen squash. This removes all air and prevents freezer burn much more effectively than regular freezer bags, extending storage time up to 18 months.
• Freezing in ice cube trays. Freeze puree in ice cube trays, then pop out the cubes and store in bags for perfectly portioned additions to smoothies or sauces.
• Blanching before freezing. Some people blanch raw squash cubes briefly before freezing, though roasting produces better flavor for most applications.
Mistakes to Avoid
• Freezing raw squash without cooking it first thinking it will save time. Raw frozen squash becomes waterlogged and mushy when thawed, with a texture that is completely unusable.
• Overfilling freezer containers or bags and leaving no headspace. Liquids expand when frozen, so puree needs room or the container will crack or the bag will burst.
• Refreezing previously frozen squash after it has been thawed. Each freeze-thaw cycle degrades quality significantly and can create food safety issues if done repeatedly.
MAKING ACORN SQUASH DESSERTS
The natural sweetness of acorn squash makes it perfect for desserts ranging from pies to cookies. Most people cannot tell the difference between acorn squash and pumpkin in baked desserts.
Use strained puree in place of pumpkin puree for classic pumpkin pie. The result tastes nearly identical with a slightly more delicate, less earthy flavor. Follow your favorite pumpkin pie recipe exactly, substituting acorn squash puree in the same amount.
Cookie and Bar Recipes
Squash puree adds moisture to cookies and bars while reducing the amount of fat needed. Try adding half cup of puree to chocolate chip cookies along with cinnamon and nutmeg. The cookies stay soft and chewy for days longer than versions without squash.
Make squash blondies by incorporating puree into a brown butter blondie base. Add white chocolate chips and pecans for a decadent dessert that happens to contain vegetables. The squash keeps the bars moist and fudgy without making them taste like vegetables.
Create squash spice cookies with puree, warming spices, molasses, and a cream cheese frosting. These taste similar to carrot cake cookies but with a smoother texture and more subtle flavor.
Other Dessert Applications
• Cheesecake. Swirl squash puree into cheesecake batter along with cinnamon and ginger for a fall-inspired dessert that is lighter than traditional pumpkin cheesecake.
• Squash Brownies. Add puree to brownie batter to create fudgy brownies with extra moisture and a subtle sweetness that complements chocolate perfectly.
• Ice Cream. Blend roasted squash puree with cream, sugar, and spices, then churn in an ice cream maker for a unique frozen dessert.
• Squash Pudding. Combine puree with milk, eggs, sugar, and spices, then bake in a water bath for a custardy pudding similar to pumpkin pie filling.
Mistakes to Avoid
• Using unstrained puree in desserts expecting the same results. Watery puree ruins dessert ratios and creates soggy, dense textures that never bake properly.
• Reducing sugar in squash dessert recipes thinking the squash is sweet enough. Acorn squash needs the full amount of sugar in recipes to achieve proper sweetness and texture.
• Skipping the spices when baking with squash assuming the squash has enough flavor. Plain squash tastes bland in desserts and needs cinnamon, nutmeg, ginger, and other warm spices to shine.
Enjoy All These Great Ways to Use Acorn Squash
You now have everything you need to make acorn squash a regular part of your cooking routine. From simple roasted halves to creative stuffed meals and even desserts, this vegetable offers endless possibilities. Start with one method that appeals to you most, master it, then branch out to try new techniques. Your confidence will grow with each preparation, and soon you will wonder why you ever found this beautiful squash intimidating.
Working with acorn squash becomes easier every time you prepare it.
The hard exterior that once seemed impossible to cut will soon feel manageable with the right techniques. Remember that even if your first attempt is not perfect, you are building skills that will serve you for years. Be patient with yourself, celebrate small victories, and enjoy the delicious, nutritious meals you create. You have got this.
Acorn squash ranks among the most underrated vegetables in the kitchen. Too many people walk past it at the store because they do not know what to do with it, but now you have the knowledge to unlock its full potential. I believe the roasted and stuffed preparations offer the best combination of flavor and presentation, though the soup is perfect for cold winter days. Give this vegetable a chance and it will earn a permanent place in your cooking rotation.
Acorn squash is nutritious, delicious, and more versatile than most people realize. This guide has given you multiple ways to prepare it, from quick weeknight sides to impressive dinner party mains. Pick the methods that fit your cooking style and dietary preferences, then enjoy this seasonal vegetable throughout fall and winter. With proper storage and these techniques, you will get the most value and flavor from every squash you bring home.
Thanks for Reading!