How to Compost Kitchen Waste for Turning Scraps into Soil
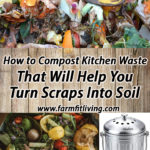
If you have a lot of leftover food scraps, you might be interested in learning to Compost Kitchen Waste.
I am a gardener who also eats a lot of fruits and vegetables. I also have a lot of waste from my three kids who sometimes take more than they can eat on their plates. Knowing how to compost kitchen waste has not only helped me have a place for the waste to go. It has helped my gardens, too.
The best thing about composting is that it turns scraps into soil. How amazing is that! Something valuable and rich that you can use again to grow more. What's not to like?
In this post, I will:
- Help you get started learning how to compost kitchen waste.
- Teach you what kitchen scraps should go into your compost…and what shouldn't.
- Let you in on the ins and outs of the composting process.
This post contains Affiliate Links. This means if you click and buy, I might make a commission at no cost to you.
See my policy for more information
Listen Here to the Podcast Episode:
Composting is a great natural place for kitchen waste to go. It's an easy way to get rid of waste materials while reusing it later on in several different ways. Let's dig right into the benefits and tell you how you can get started building your own compost.
Getting Started with Composting
The first thing you have to do when you decide you want to start composting your kitchen waste is to obtain a compost bin for composting materials. I'll go into that more in a second.
But you also need to know what you can put into a compost. Nutrient-rich compost is soil (basically) and soil is a scientific compound. There's more to soil than you think. There's biological process for a proper environment for earthworms, micro organisms and microbials. And so much more.
So, you need to keep in mind that compost must be an even distribution of materials to make the end result correct. It is sort of like building a lasagna. You alternate compostable materials, moist and dry, green and brown in an ideal environment.
I've linked to some other posts below that will go more into the science of this topic of composting. For today, we are going to stay inside our kitchen and talk solely about learning how to compost kitchen waste.
Composting Food Waste Benefits
There's many benefits to composting food waste. I've already talked about a few. Another one is convenience.
Ya know, as a Ruralite myself, I don't really have the capability of having a trash bin or a place to store waste. Growing up, my parents had a burn pile that would turn the waste into a firery pile of ashes. But then it couldn't be used making great soil.
Also, the struggle of not having a place to put waste is just that. A struggle. Yes, we could feed it to the pigs or chickens. That is always an option. But you shouldn't feed them a lot of that type of thing at once so then you still have some leftover. Plus, they don't eat everything you can put into a composting bin.
That's where having a compost bin can serve as a place to put those types of waste that can't really be used for anything else. Let's talk about the good scraps that work good for compost.
Kitchen Scraps You Can Compost
I should say (kitchen and home scraps). This is a short list of nitrogen-rich materials but it's enough to start to make a proper amount of compost from your waste.
Here's the list:
- Fruit and vegetable peelings and scraps,
- Tea bags/coffee grounds,
- Banana Peels
- Egg shells,
- Grass cuttings or leaves from indoor plants,
- Small amounts of shredded paper or soft cardboard,
- Animal Hair,
- Vaccuum or swept up floor dust/dirt.
So, as you can tell, there's some thing you probably should not ever put into your compost. Here is the list for that.
Kitchen Scraps You Should Avoid
For certain reasons, there are items you should really avoid adding into your compost:
- Citrus peels
- Onions
- Fish and Meat scraps
- Glossy/Coated paper
- Ashes from a fireplace
- Dairy products.
- Pet waste
These items aren't great for compost because they change up the nutrient composition of the compost. Again, you can read some of my other composting posts for more science based information. Let's talk briefly about how compost is made.
How to Make Compost
Basically, great soil is made up of Nitrogen, Phosphorus, Potassium and natural organisms. So, you want to add in an even mix of green materials, brown materials and nitrogen to make a good environment for the microorganisms to get to work breaking down the compost materials.
Preparing to compost involves setting up your composting system and gathering the necessary materials.
Here are some tips to get you started:
- Choose a location: Select a suitable location for your compost pile or bin. It should be well-drained and easily accessible, preferably in a sunny or partially shaded area.
- Select a composting method: Decide on the composting method that best suits your needs and space. Options include traditional compost piles, compost bins, or vermicomposting (using worms).
- Gather materials: Collect the materials you will use for composting. This includes a mix of "green" materials (such as kitchen scraps, grass clippings, and fresh yard waste) and "brown" materials (such as dry leaves, straw, and shredded paper).
- Shred or chop materials: For faster decomposition, chop or shred larger materials into smaller pieces. This increases the surface area and helps the materials break down more quickly.
- Layer materials: Alternate layers of green and brown materials in your compost pile or bin. Aim for a balance of roughly 50% green and 50% brown materials by volume.
- Add water: Moisten the compost materials as you layer them. The pile should be about as damp as a wrung-out sponge. Water helps the microorganisms break down the materials.
- Aerate the pile: Regularly turn or aerate the compost pile to provide oxygen to the microorganisms. This helps speed up the composting process and prevents odors.
- Monitor the compost: Keep an eye on the moisture level and temperature of the compost pile. Adjust as needed to maintain a healthy composting environment.
- Be patient: Composting is a natural process that takes time. Depending on the materials and conditions, it can take several months to a year for compost to be ready.
And that's why compost should be layered like a lasagna. The layers should be green material, brown material, nitrogen, soil, water. Then, just let the magic happen, turning it ever so often.
How long does the composting process take?
The common composting process takes 6 months to a year and high temperatures to complete. If you just throw in pieces and scraps and large amounts of waste, it's going to take longer. There's a quicker way.
To cut that time in half, keep your compost pile small. Kitchen compost in a small compost bin will get hotter quicker in small spaces than out in a large compost bin.
Then, turn it over to allow air in about once per week. This also helps get air to the earthworms and microbes that are working hard to help breakdown the compost.
Continue to keep the compost moist. and the carbon to nitrogen ratio of 2:1 right as you continue to add more in. Keep the pieces as tiny as possible. That will also help speed up the compost process.
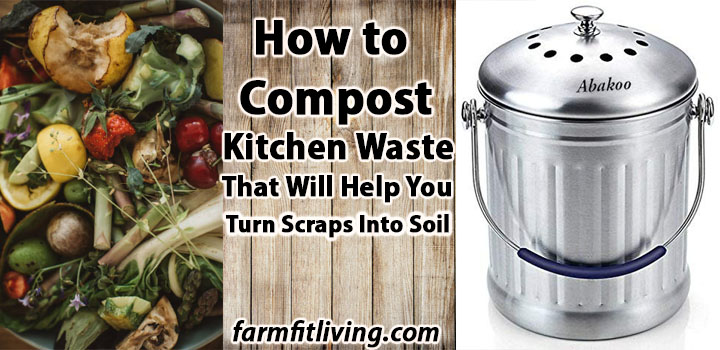
Top 5 Simple compost bins for your Kitchen Waste
I'm about to share with you 5 top rated compost bins for your kitchen. These are the bins that hold in the smells while you keep them conveniently in your kitchen.
1. The Farmhouse style Kitchen compost bin. It's 1.3 gallon, easy to clean and comes with some great non-smelling filters. Get more information here.
2. For Teal Lovers Compost Bin: A compost bin in your favorite color! It's easy to use and cute on your countertop. Plus, it comes with charcoal filters and a great how-to guide.
3. Mountable Kitchen Compost Bin: The simple choice for anyone who wants their compost bin out of reach. Perfect for moms with young kids. Go here for more.
4. Simple Utopia Compost Bin: An elegant edition to your kitchen. Who will even know it has kitchen waste in it? Find out more here.
5. Epica Compost Bin: Similar to the Akaboo. Still elegant and comes with built in filters. Check it out here.
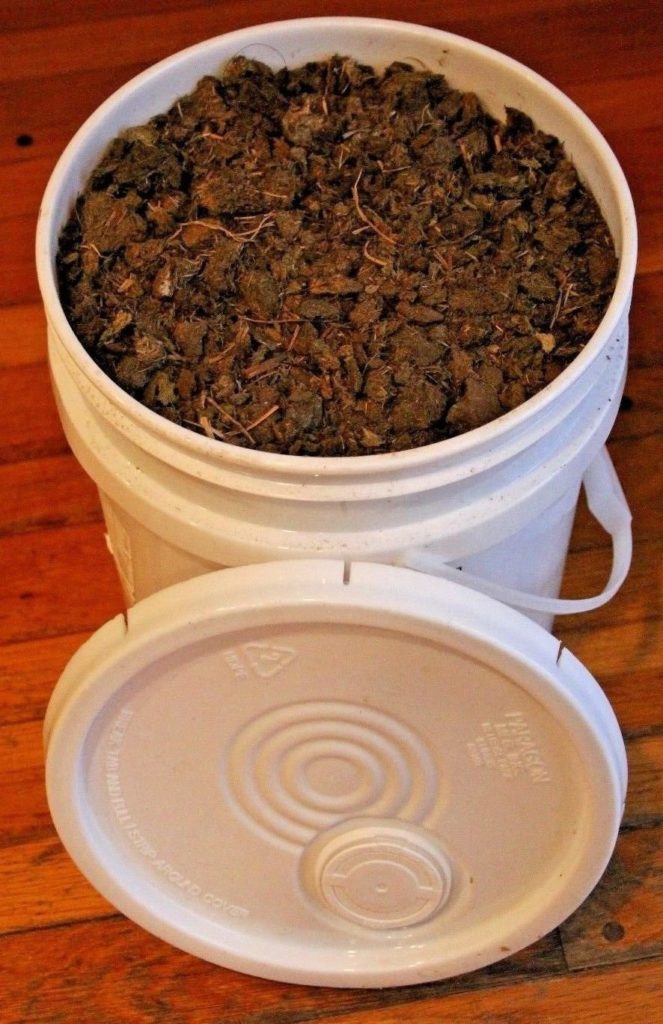
What Your Finished Compost Will Look Like
Compost is typically ready to use when it has broken down into a dark, crumbly, earthy-smelling material. Here are some signs that your compost is finished:
- Appearance: The compost should be dark and crumbly, resembling rich, fertile soil. You should no longer be able to distinguish the original materials.
- Texture: The compost should have a fine, crumbly texture that is easy to work with. It should not be lumpy or chunky.
- Smell: The compost should have a pleasant, earthy smell, similar to fresh soil. It should not smell sour, ammonia-like, or rotten.
- Temperature: The temperature of the compost pile will also decrease significantly as it finishes composting. It should feel cool to the touch, indicating that the microbial activity has slowed down.
- Time: Depending on the materials used and the composting conditions, it can take anywhere from a few weeks to several months for compost to be ready. Generally, a well-maintained compost pile will produce finished compost in 3 to 6 months.
If you're unsure whether your compost is done, you can do a simple test by placing a small amount in a sealed plastic bag for a few days. If the bag doesn't develop any unpleasant odors, the compost is likely finished and ready to use.
Quick Ways to Use Your Compost
- Soil amendment: Mix compost into your garden soil to improve its structure, water retention, and nutrient content. This can help your plants grow healthier and more productive.
- Mulch: Spread a layer of compost around your plants to help retain moisture, suppress weeds, and provide nutrients as it breaks down.
- Potting mix: Use compost as part of a homemade potting mix for container plants. It can improve the soil structure and provide nutrients to your plants.
- Top dressing: Sprinkle compost on the surface of your lawn or garden beds as a top dressing. This can help improve the soil structure and provide nutrients to the plants.
- Compost tea: Steep compost in water to create a nutrient-rich liquid fertilizer. Use this to water your plants for an extra boost of nutrients.
- Seed starting: Mix compost with other materials like vermiculite or perlite to create a seed starting mix. This can help provide nutrients to young seedlings as they grow.
- Erosion control: Use compost to help stabilize slopes and control erosion. The organic matter in compost can help bind soil particles together and reduce runoff.
- Repotting Houseplants: Use compost as a top dressing for indoor plants or mix it into the soil when repotting to provide nutrients.
Convert Kitchen Waste into Compost
There's a lot of good benefits to learning how to compost kitchen waste. It's simple and convenient. And if you get a little compost bin, you'll find that they actually make a really cute edition to your kitchen. Plus, it's just another skill you can learn and have for life that no one can take from you. Your knowledge is YOURS and no one elses. Learning new things is a skill to cherish and hold tight.
All you have to do is bite the bullet and get started saving your waste. Gather your organic materials along with a compost tumbler or regular bin and let's get started building some amazing hot compost that will help you grow great gardens you can be proud of.

Make Gardening Simple Now!

Simple gardening equals smart gardening. In this short, easy to read book, you'll get access to all the best practices and tips for gardening smarter and more successfully. If you want more information, I'll send it right to your email inbox!