
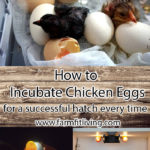
How to Incubate Chicken Eggs for a Successful Hatch Every Time
Want to know how to Incubate Chicken Eggs so you can hatch some baby chicks?
Learning how to Incubate Chicken Eggs is a fun process. If you're wanting to experience the entire process of raising chickens, then look no further from learning to hatch your own.
I'm going to be giving you expert tips for incubating your own chicken eggs so that you can hatch your very own baby chicks using an incubator.
In this post, I will:
- Give you all the steps for how to incubate chicken egg successfully,
- Share some general hatching rules for chicken eggs,
- Give you a brief summary for how to care for baby chicks once they are hatched.
Resources For You
I've developed some easy chicken egg incubation resources for you. They include an incubation chart and a one page record keeping calendar to where you can keep track of important things such as temperature and humidity as well as candling day by day.
I'm hoping that this episode has everything you need to successfully incubate chicken eggs, so are you ready to dive in? Let's get started.
Listen to the Episode:
This post contains Affiliate Links. This means if you click and buy, I might make a commission at no cost to you.
See my policy for more information
Where to Get Fresh Fertilized Eggs
The very first thing that you need to think about is how you're going to get fertilized eggs.
If you have your own chickens and you have a rooster with them, then you can get fertilized eggs. But if you don't keep a rooster with your chickens, then you can get a hold of a neighboring farmer that would have fertilized eggs.
Remember, a hen can lay eggs without a rooster. These eggs just are not fertilized.
Storing Fresh Eggs
So once you get a hold of your fertilized eggs, understand that they can be kept room temperature for seven days before you get your your incubator prepared for a hatch.
As you get your incubator ready, you can also keep fertilized eggs in a refrigerator or a cool, very cool place for up to two weeks. Just remember to rotate them daily, whether they're in the refrigeration or in room temperature.
Either way they should be kind of turned or rotated daily, side to side. This will keep the yolk from being stuck to one side for too long. Also, the chicken egg should be stored pointy end down. The pointy end should be down at all times during storage and also while in the incubator.
Setting Up Your Incubator
The top thing you need when learning how to incubate chicken eggs is a good quality incubator. You can pick up incubators at any of the farm stores around you. You can also look on Craigslist or your Facebook marketplace for used incubators. Mine is a used incubator that I got from a local friend and it works very well.
Here's the one I have used for years.
I've had it for several years and it's just like the one I used when I was learning how to incubate chicken eggs. It has hatched several hundred chickens, baby checks very successfully and very easy to use.
So you found an incubator to use. What next?
I always recommend having an automatic egg turner so you won't have to remember to turn eggs. You don't have to have one, though. You can simply turn eggs a few times a day. I've done both ways and both are just fine.
Once you get your incubator and turning method, you need to get it all set up and make sure it runs properly. So you need to get it all put together and plugged in without the eggs in it to make sure that it's working properly.
Then, pour some water in to get the humidity up to normal. The temperature reading should hold steady at 99.5 degrees Fahrenheit and the humidity should be around 60% humidity. These are normal numbers for hatching chicken eggs.
Run your incubator without any eggs for a few days to make sure that all is holding steady.
I'll talk about some troubleshooting problems later on, but just know that your humidity fluctuates.
The water is going to evaporate out of your incubator, so you may need to add some more water. You're going to want to check that humidity level every day to make sure that it doesn't drop below 50%.
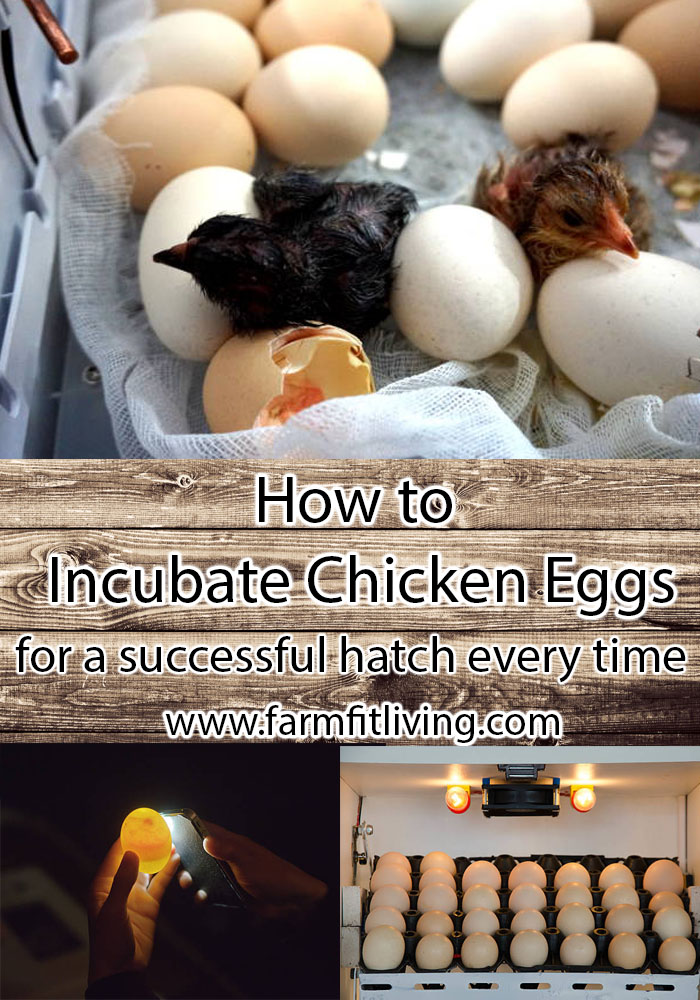
So once your incubator is ready and has been holding steady for a few days, it's time to put those eggs in. Put the eggs into the turner pointy end down or just lay them gently on their side.
If you're going to turn them automatically, you can mark two sides of the eggs so that you know which side you turn. For example, put an X on one side and an O on the other so that you can chart what has been turned or not. It's important to keep those eggs turn daily. At least two or three times a day. And you're going to continue to do this until you hear baby chicks peeping inside.

Incubating Chicken Eggs 101
Throughout the process you're going to be making sure the eggs are being turned, whether it be an automatic turner or by hand.
You're also going to be checking the temperature and humidity levels daily.
Finally, you're going to want to candle the eggs about halfway through the 21 days.
Here's a basic tutorial on candling:
So at about day eight to 10, you can carefully take an egg out, use a flashlight or a candle in a dark room, just turn out the lights and grab a flashlight. Use a piece of folded up paper or just your hand to cup the egg to where it's completely dark and then shine the flashlight underneath.
If you see a large mass inside the egg, that means that you have a growing embryo in there. If you see air pockets all the way through the egg, that means that there is no embryo in it. You would then discard the egg at that point because by day eight, if it doesn't have an an embryo in it, then it's not going to make a chick.
That's why you candle:
So that you can improve your hatch success rate by discarding the eggs that don't have anything in it.
You can candle as many times as you want. However, there's a risk of the egg, the embryo, getting some bacteria. Since it's being exposed to the air and things like that, it's recommended that you only candle one to two times through the process. You can get a pretty good idea of of the embryo if you candle at day eight that there's going to be an embryo in it. The other time to candle would be day 14 or day 16.
At day 18, you're going to stop turning the egg.
It's time to take the automatic turner out of the incubator or you're going to stop turning the all together about three days before hatching.
So once you've done your candling and you've hit day 18 you're going to stop turning the eggs so that the check can finish incubating without being turned.
By that time you might even start to hear some peeping. You'll hear a little chirping inside the eggs. No, it's not a bird outside. It is actually your chicks inside the eggs. I know it's so exciting to hear that noise but when you hear it, you do not want to open the incubator anymore at all. Leave them alone and just try to look through the windows of the incubator to see what's going on in there. Do not open the incubator for any reason.
Then by day 21 you should start to see some hatching.
You want to leave the incubator door closed because you don't want to get any cold air or any bacteria in there and you don't want to disturb the chick either.
Let the chick do its own thing and get out of the egg itself. Even if it looks like it's uncomfortable getting out of the egg, you don't want to help it. You want to let it do it itself. Remember that chicks have been getting out of eggs in nature for thousands of years. You just need to let them do it themselves.
It can take hours for a baby chick to bust through their egg completely. You're going to want to let it dry completely before you put them in the brooder box.
Baby Chick Care After Hatching
This is where your chicken supplies will come in.
First, you're going to need your brooder box. I like to use just a large tote and I put a little bit of paper or wood chips or bedding in the bottom. I have my heat lamp all set up and I have my egg cartons with water and food ready to go.
Then I just wait for that chick to be completely dry. You want the checks to be 100% dry, as dry as possible and all fluffy before you put them in that brooder box.
They can stay in the warm incubator for up to 48 hours.
In that time, you'll have other chicks hatch as well. But you want to get hurry and get the dry ones out as soon as they are dry.
Once you take them out of the incubator and they're all dry and fuzzy, they're going to be really hungry and thirsty. So you're going to want to dip their beaks into the water and the food that you have already to go. Then just set them in their brooder box and they are good to go. Just leave them in there under the heat lamp and they'll start learning how to live. Now let's talk about some troubleshooting that you might face.
Troubleshooting Incubator Problems
I'm going to give you five different troubleshooting tips for some problems you might face here. These are essential to know when learning how to incubate chicken eggs for a successful hatch.
1. So first of all, what if the power goes out?
What if there's a big storm and the power completely goes out and your incubator goes off? Okay, first of all, don't panic. Don't do anything. Simply wait for the power to return and continue incubating as normal. Your hatch might be delayed by as many hours as the power was out, so just keep that in mind so it's not a huge deal.
If the power is out for more than two days, then then you have problems and you'll probably lose your hatch. But it is what it is. And there's really nothing you can do about it. Usually the power comes back on pretty quickly. Everything should be fine.
2. Second, maybe the humidity is too high.
If it's too high, if you check in, it's too high. Reduce the amount of surface area for the water cover and cover with aluminum foil. So you want to basically reduce the amount of water that's hitting the ink, hitting the incubator control.
So if you cover with aluminum foil, that should reduce the amount of humidity. Have not sure by how much, I've never had to do this, but that is how you do it and just keep it on there until your humidity is back to around that 60% Mark.
3. What if your humidity is too low?
With this, you want to do the opposite. You want to increase the amount of surface area, fill another trough with water or add a clean damp sponge to the environment. Either one of those will increase the amount of area that is moisture and in turn will increase the humidity.
4. Now what if you notice a cracked or broken egg?
Well, you want to remove a cracked or broken egg as quickly as possible and discarded.
This is kind of why you candle as well. It's kind of an inspection a year time to inspect.
So about day eight or day 16 or so, you want to go ahead and inspect as many eggs as possible, look them over, make sure none are cracked, and make sure that you have embryos inside. All right?
5. Finally, what if the temperature is too high or too low?
Well, you can adjust your thermostat on your incubator slightly and check its progress frequently about every 15 minutes until the desire temperature is reach. You just need to know your incubator and that's why I tell you to do a test run for a few days before you put the eggs in.
That'll kind of give you an idea of how your incubator works, how touchy it is, how often you need to add water, how often you need to take away water and all of that. So that's a very good time to understand your incubator and how that works.

Wrap Up
This concludes the episode about how to incubate chicken eggs for a successful hatch every time. I hope you learned a lot from this episode. You're now ready to get your incubator and hatch out your own baby chicks.
Again, it's something that I love doing with my girls. I got my start as an Extension agent. I was going into the schools and hatching out baby chicks with the third grade classes. They just absolutely loved it and I loved it too.
Also, I remember years ago when I was in third grade and we learned how to incubate chicken eggs and hatch baby chicks. We wanted to take them home. However they got sent home with a farmer to take care of them and that is my last piece of advice to you. If you do hatch out chicks in the schools with a group of school kids or 4-H kids who maybe live in town and don't live on a farm, it might be a good idea not to let them take the chicks home. But to send them home with a farmer. That's just a humane act.
So with that, I'm going to end this episode. Friend, if you know of somebody who needs to hear this message, please take the time and share it with your friend.
If you never want to miss a single episode ever again, you can also subscribe and listen for free at:
- Apple Podcasts
- Spotify
- Podbean
- PlayerFM
- Deezer
You can also leave us a five star review. We will absolutely love that. Thank you for listening to the Rural Women Inspired Podcast.


