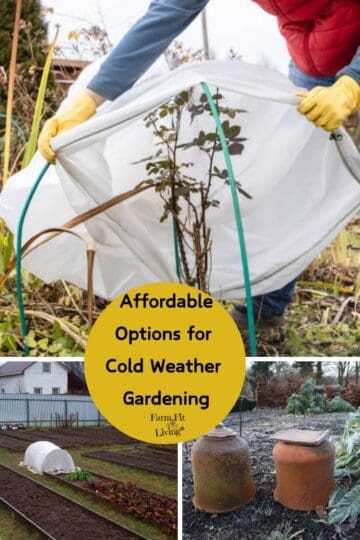
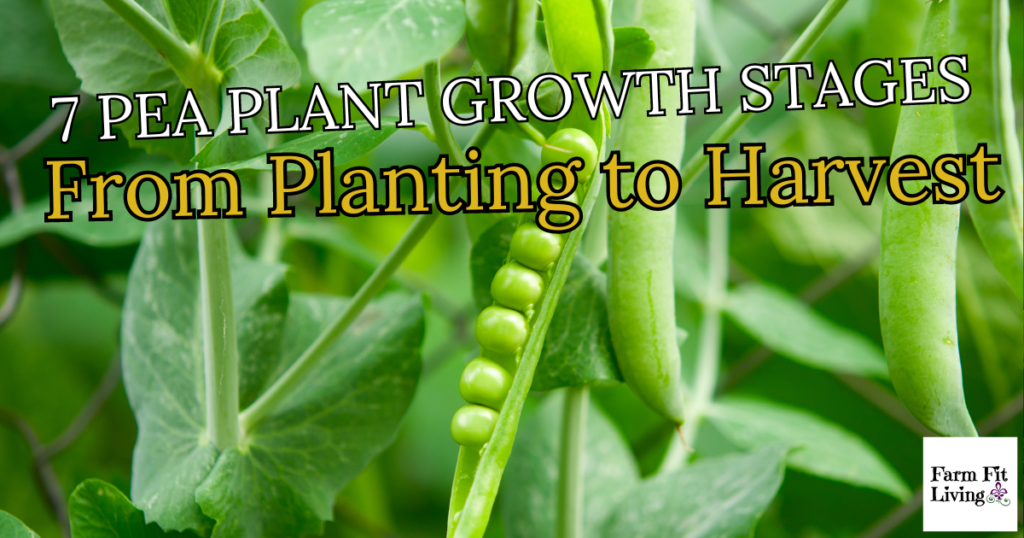
7 Pea Plant Growth Stages from Planting to Harvesting
What are the pea plant growth stages from the time of planting to when you harvest them for a tasty snack?
Is your mouth watering for some tasty green peas? Knowing and understanding pea plant growth stages will hopefully help you pass the time while you wait for delicious peas to eat.
Peas are mainly a cool-season crop but you can grow different varieties of peas in the early spring, for a fall harvest or to harvest in late winter. Peas are a perfect way to extend your vegetable garden season. Plus, they taste delicious! My favorite are the super sugar snap peas.
In this post, I will:
- Explore the 7 pea plant growth stages
- Discover what is the timeline of pea plants from planting to harvest time
- Answer the question: "Do Pea Plants grow Fast or Slow?"
Let's dig into the 7 pea plant growth stages.
Pea Plant Growth Stages
After you plant pea seeds, the pea plants go through several distinct growth stages. Here are the typical stages:
- Germination
- Seedling
- Vegetative growth
- Flowering
- Pod development
- Maturity
- Harvest
Germination
This is the initial stage where the seed absorbs water and begins to sprout. A small root (radicle) emerges first, followed by a shoot (plumule) that grows upward. How long does it take for a pea plant to grow? Well, germination is the first step because no growth can actually happen without germination. Also, your seed packet will tell you a lot as well as the types of peas you are planting.
Germination in a pea plant, like in most plants, is the process by which a seed sprouts and begins to grow into a new plant.
In peas, this process typically involves the following stages:
- Imbibition: The seed absorbs water, causing it to swell and become activated. This triggers metabolic processes within the seed.
- Activation of Enzymes: Enzymes within the seed are activated, which start breaking down stored nutrients (such as starches and proteins) into forms that the growing plant can use.
- Radicle Emergence: The radicle, which is the embryonic root of the plant, emerges from the seed first. It grows downward into the soil, anchoring the plant and absorbing water and nutrients.
- Hypocotyl Elongation: The hypocotyl, which is the embryonic stem of the plant, starts to elongate. It pushes the cotyledons (seed leaves) above the soil surface.
- Cotyledon Expansion: The cotyledons unfurl and expand, becoming the primary site for photosynthesis until the true leaves develop.
- Development of True Leaves: Once the cotyledons have expanded, the plant begins to develop true leaves, which are the leaves that resemble the adult plant's leaves.
In peas, the process of germination usually takes about 4-7 days under optimal conditions, which include adequate soil moisture, oxygen, and a suitable air temperature range (around 18-24°C or 64-75°F).
Seedling
In this stage, young pea plants continues to grow, developing their first true leaves. The pea seedlings stage lasts until the plant seedlings are well-established and start to produce more leaves.
The seedling stage in pea plants begins once the seed has germinated and the embryonic plant has emerged from the seed coat. During this stage, the pea plant undergoes rapid growth and development as it establishes itself and prepares for further growth.
Here are some key characteristics of the seedling stage in pea plants:
- Seedling Growth: The seedling initially consists of the radicle (embryonic root), hypocotyl (embryonic stem), and cotyledons (seed leaves). As the seedling grows, the hypocotyl elongates and pushes the cotyledons above the soil surface.
- Development of True Leaves: As the seedling continues to grow, it develops its first set of true leaves. These leaves look more like the mature leaves of the pea plant compared to the cotyledons, which are often thick and fleshy.
- Root Development: The root system of the seedling expands and develops secondary roots. These roots help anchor the plant in the soil and absorb water and nutrients.
- Photosynthesis: The cotyledons initially provide energy to the seedling through stored nutrients. However, as the true leaves develop, they take over the role of photosynthesis, producing energy for the growing plant.
- Establishment of Plant Structure: During the seedling stage, the basic structure of the pea plant is established. This includes the development of the main stem and the formation of branching points where new leaves and flowers will grow.
The seedling stage is a critical phase in the life cycle of pea plants, as it sets the foundation for further growth and development. During this stage, the plant is vulnerable to environmental stresses and requires care to ensure healthy growth.
Vegetative Growth
During the vegetative growth stage in pea plants, the focus is on the development of the plant's vegetative structures, such as leaves, stems, and roots. This stage follows the seedling stage and precedes the reproductive stage, during which the plant produces flowers and seeds.
Here are the key features of the vegetative growth stage in pea plants:
- Leaf Development: The plant continues to produce new leaves, which increase the surface area available for photosynthesis. The leaves are important for capturing sunlight and converting it into energy for the plant.
- Stem Growth: The stem of the pea plant elongates, allowing the plant to reach taller heights. The stem provides support for the leaves and flowers and transports water and nutrients between the roots and the rest of the plant.
- Root Growth: The root system of the pea plant continues to grow and develop. The roots anchor the plant in the soil and absorb water and nutrients, which are essential for growth and development.
- Branching: Pea plants are known for their tendency to produce tendrils, which are specialized structures that help the plant climb and support itself. During the vegetative growth stage, the plant may produce lateral branches that further increase its ability to capture sunlight.
- Nutrient Uptake: The vegetative growth stage is characterized by high nutrient requirements as the plant actively grows and develops. Adequate soil nutrients, especially nitrogen, phosphorus, and potassium, are essential for healthy growth.
- Environmental Factors: The growth of pea plants during this stage is influenced by environmental factors such as temperature, light, and moisture. Pea plants thrive in cool temperatures and require well-drained soil and adequate sunlight for optimal growth.
Supporting Pea Plants
It is also time at this stage to make a pea trellis if you want to keep your pods off the ground. You can use chicken wire or baling twine to make your own DIY pea trellis. Go Here for the Entire Tutorial on how to Make a Pea Trellis.
The vegetative growth stage is crucial for the development of a healthy and productive pea plant. Proper care during this stage, including watering, fertilization, and pest control, can help ensure vigorous growth and prepare the plant for the reproductive stage.
Flowering
Pea plants start to produce flowers once they reach maturity. Pea flowers are typically white, pink, or purple, and they are self-pollinating.
The flowering stage in pea plants is a critical phase in their life cycle, as it is when the plant produces flowers that eventually develop into pods containing seeds.
Here are the key features of the flowering stage in pea plants:
- Initiation of Flower Buds: As the plant matures, it begins to produce flower buds at the tips of the stems. These buds contain the reproductive structures of the plant.
- Flower Development: The flower buds gradually develop into fully formed flowers. Pea flowers are typically white, pink, or purple, depending on the variety.
- Pollination: Pea flowers are usually self-pollinating, meaning that pollen from the stamen (male reproductive organ) fertilizes the pistil (female reproductive organ) within the same flower. However, they can also be cross-pollinated by insects.
- Pod Development: After pollination, the fertilized flowers develop into pods. Pea pods are the fruit of the plant and contain the seeds.
- Seed Development: Inside the pods, the fertilized ovules develop into seeds. The seeds grow and mature within the pods, which eventually become swollen and filled with seeds.
- Senescence: After the seeds have fully developed, the plant begins to senesce (age). The leaves may start to yellow, and the plant redirects its energy from growth and reproduction to seed maturation.
- Harvest: Pea pods are typically harvested when they are fully mature but still tender. The timing of harvest depends on the desired use of the peas, as they can be eaten fresh or allowed to dry for later use as dried peas.
The flowering stage is a critical period for pea plants, as successful pollination and seed development are essential for producing a crop. Proper care during this stage, including adequate water, nutrients, and pest control, can help ensure a healthy and productive harvest.
Pod Development
After pollination, the flowers are fertilized, and pea seed pods begin to develop. The pods grow larger and eventually become filled with mature peas.
Pod development in a pea plant is a fascinating process that begins after successful fertilization of the flower.
Here's how pod development typically progresses:
- Post-Fertilization Changes: After fertilization, the ovary of the flower starts to develop into a pod. The petals, sepals, and stamens of the flower may wither and fall off as the pod develops.
- Pod Growth: The ovary wall thickens and elongates to form the pod. The pod grows in size, gradually enveloping the developing seeds inside.
- Seed Development: Inside the pod, the fertilized ovules develop into seeds. The seeds grow and mature, accumulating nutrients and water from the plant.
- Pod Maturation: As the seeds mature, the pod undergoes changes in color, texture, and shape. The pod becomes firm and reaches its full size.
- Harvest: The timing of harvest depends on the intended use of the peas. For fresh peas, the pods are harvested when they are fully developed but still tender. For dried peas, the pods are left on the plant until they are fully mature and dry.
- Seed Dispersal: In nature, mature pea pods eventually dry out and split open, releasing the seeds. The seeds may be dispersed by wind, animals, or other means to grow new pea plants.
- Senescence: After seed dispersal, the pea plant typically senesces and dies back, completing its life cycle.
Pod development in pea plants is a crucial stage that determines the yield and quality of the crop. Proper care during pod development, including adequate water, nutrients, and pest control, can help ensure a successful harvest of peas.
Maturity
Pea plants reach maturity when the pods are fully developed and the peas inside are mature. The pods may change color and become more rigid.
Maturity in a pea plant refers to the stage at which the plant has completed its growth cycle and is ready for harvest.
Maturity can be assessed based on several factors specific to pea plants:
- Pod Appearance: Mature pea pods are typically well-filled, firm, and have reached their full size. The color of the pods may also change, depending on the variety, from green to yellow or brown.
- Seed Development: Inside the pods, the seeds have reached their full size and are mature. They are plump and firm, indicating that they are ready for harvest.
- Pod Texture: The texture of the pod changes as it matures. Mature pods are firm and crisp, while immature pods are soft and pliable.
- Flowering and Senescence: The plant may stop producing new flowers, and the older leaves may start to yellow and wither as the plant redirects its energy towards seed maturation.
- Taste and Texture: Peas are often sweeter and more tender when harvested at the peak of maturity. Overripe peas may become starchy and less flavorful.
- Timing: The timing of maturity varies depending on the pea variety and growing conditions. It is typically around 60-70 days after planting for many varieties of garden peas, but this can vary.
Harvesting at the right stage of maturity is crucial for the best flavor and texture of peas. Harvesting too early can result in immature, small peas, while harvesting too late can lead to overripe, starchy peas.
Harvest
Peas are typically harvested when the pods are plump and the peas inside are fully developed. Depending on the variety, peas may be harvested while the pods are still tender (for eating whole) or left to mature further for shelling.
Harvesting peas at the right time is crucial to ensure the best flavor and texture.
Here's how you can determine when to harvest peas:
- Pod Appearance: Look for well-filled pods that are firm and plump. The pods should have reached their full size and be a bright green color (or the color characteristic of the variety you're growing).
- Seed Development: Check a few pods by opening them to see if the peas inside have reached their full size. They should be round and firm, with a glossy appearance.
- Taste Test: Taste a few peas to determine their sweetness and tenderness. Peas are sweetest and most tender when harvested at the peak of maturity.
- Harvesting Technique: Use two hands to pick peas to avoid damaging the plant. Hold the stem with one hand and gently pull the pod with the other. Alternatively, use scissors to cut the pods from the plant.
- Frequency: Harvest peas regularly to encourage continued production. Check the plants every day or every other day during the harvest period.
- Storage: Peas are best eaten fresh but can also be stored. If you're not eating them immediately, store them in the refrigerator in a perforated plastic bag for up to a week.
- Drying Peas: If you're growing peas for drying, leave the pods on the plant until they are fully mature and dry. Harvest the pods before they split open and store them in a cool, dry place to finish drying.
Harvesting at the right time ensures that you get the best-tasting peas from your garden.
Using Fresh Peas
Fresh peas can be a delightful addition to many dishes! They can be used in salads, pastas, risottos, or simply enjoyed on their own as a side dish.
For a simple recipe, you can sauté fresh peas with some garlic and olive oil, season with salt and pepper, and finish with a squeeze of lemon juice for a bright and flavorful dish. You can also incorporate fresh peas into soups, stews, or even use them as a topping for pizzas or flatbreads. The possibilities are endless!
Storing Fresh Garden Peas
To store peas, follow these steps:
- Remove each shelling pea from Pods: If the peas are still in their pods, shell them and discard the pods back into your compost. Only keep the fresh peas.
- Wash: Rinse the peas under cold water to remove any dirt or debris.
- Dry: Pat the peas dry with a clean towel or paper towel. Excess moisture can lead to spoilage.
- Storage Containers: Place the peas in a breathable storage container such as a perforated plastic bag or a vegetable crisper drawer in the refrigerator. Do not store them in airtight containers, as they need some airflow.
- Temperature: Store the peas in the refrigerator at a temperature of around 32-40°F (0-4°C). They should last for about 3-5 days.
It's best to use fresh peas as soon as possible during the harvest season for the best flavor and texture. If you can't use them right away, blanching and freezing is a great way to preserve sweet peas for longer storage.
Understanding these 7 Pea Plant Growth Stages
For best results in growing peas in your garden beds, get to know the 7 pea plant growth stages. Understanding the vital steps and features of each pea plant growth stages can help you care for your pea plants and harvest them at the right time for the best flavor and texture.
Whether you're growing shelling peas, field peas or snow peas, the growth stages are very similar. They are all sustainable to different growing problems, such as fungal diseases and insects. It's always a good idea to strictly manage and scout your young plants for issues early on so you can control them. I hope this post will help home gardeners to understand and recognize how pea shoots grow and produce delicious and nutritous peas.
~ Happy Gardening~