
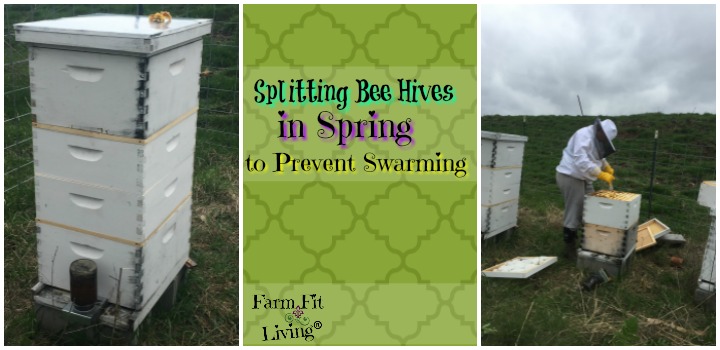
Splitting Bee Hives in Spring to Prevent Swarming
Do you have questions about splitting bee hives in Spring?
You're in luck! I'm going to share with you today some techniques for splitting bee hives in Spring. I'm going to cover:
- Techniques for reversing and splitting bee hives in spring.
- How to split a bee hive easily.
- What you should see inside the hive.
- When is it too late to split a bee hive?
- Equipment needed.
- And more!
Listen to the Podcast Episode:
Let's start with why. Why a hive should be split in the spring. Here are the factors you should consider for splitting bee hives in Spring.
Why Should A Hive be Reversed and Split in the Spring?
There is one answer only for this: To prevent swarming from happening! You don't want your bees to leave the hive. And reversing/splitting the hives helps to prevent:
- Overpopulation
- Congestion
Spring is the time when the Queen is vigorously laying eggs. When those brood hatch, the hive population will increase dramatically! So, beekeepers need to be thinking ahead now to help prevent swarming due to a heavy increase of young bees.
So, reversing is switching the top box with plenty of bees with the bottom box. It greatly helps to reduce congestion in the hive and give the bees so much more room. It also puts the Queen on the bottom of the hive since the bees move and feed upward.
Now, splitting. If both hive bodies are super populated, the hive can be split now. I'm going to list the steps out for you for splitting the hive while reversing them. This will help reduce the amount of time into the hive, while changing up the dynamics of the hive to help prevent swarming.
Dynamics of a Hive in the Spring
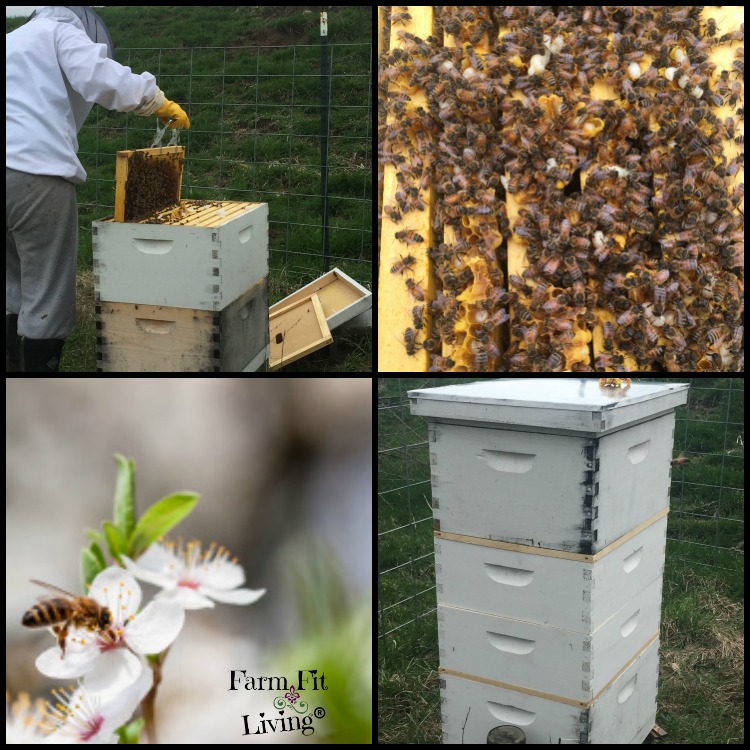
The hive should be alive and well in the spring! Here's what you should see:
- Good traffic coming in and out of the entrance of the hive.
- Bees in your yard and spring blooming flower beds.
- Open the hive cover and you'll see a good amount of bees on top and in the spring.
- Pull out a frame and you'll see plenty of capped brood cells with nurse bees.
- You should search to make sure there's a queen - She should be laying and moving around.
While you inspect, you may also see some unwanted sights in the hive. You may see parasites, such as wax moth or hive beetle larvae. There might also be wildlife that made their way in. So, be sure to really inspect the population of the hive as well as the health of it inside.
Next, let's cover the important parts of the hive you need to reverse and split.
Equipment Needed for Splitting Bee Hives in Spring
Through the winter, you may have had two deep brood boxes with an inner cover and outer cover on top. As the bees move to survive the cold in their cluster, they move upwards into the top brood box.
As spring hits, the super boxes (shallow boxes) can be ready to put on to prepare for the upcoming honey flow. I also use Queen Excluders to keep the Queens from crawling into the super boxes and laying brood in those frames.
An extra bottom board can be used to set the top box on during the process. This keeps the bees from falling down into the grass.
Here's some more equipment I use to reverse and split hives:
- Beekeeping suit
- Beekeeping Gloves
- Smoker
- Bee Brush
- Frame Grip
- Hive Tool
- Entrance Feeders with Mason Jar & 1:1 Sugar Water
Don't have your equipment yet? Check out my beginning equipment check list here.
Reversing Honey Bee Deep Boxes
The first thing you need to do when you reach the bee yard is to put on your protective gear. You don't want to get stung, right?
Next, use your hive tool to separate the bottom brood box from the top. It will be sticky and stuck together. Then, you can carefully lift it off and set it on the extra bottom board. It's time to inspect that bottom brood box now.
For the inspection:
- You can use your smoker to calm the bees.
- Use your frame grip to carefully lift up one frame at a time. Check for capped brood and bee activity. You can check for the queen but she should be in the top box more than likely.
- Also, check for any parasitic larvae. Identify what you might be dealing with.
- Check the health of the bees. Are they highly populated in that brood chamber? Actively working away? Taking care of the parasitic larvae?
Then, remove that bottom box from the bottom board and set it aside on an extra bottom board. Move over to the top brood box, pick it up carefully and set it on top of the home bottom board. It is now the bottom box. You can now inspect it using the same process as above.
After inspecting, you can decide whether or not to split the hive right then and there.
How to Split a Bee Hive to Prevent Swarming
Now this is what you've been waiting for. This is why you clicked on this post! Here's the decision to be made:
- Plenty of capped brood and nurse bees in both chambers?
- Lots of bees on the frames in both chambers?
- Clean hives? No parasites? Nice healthy frames?
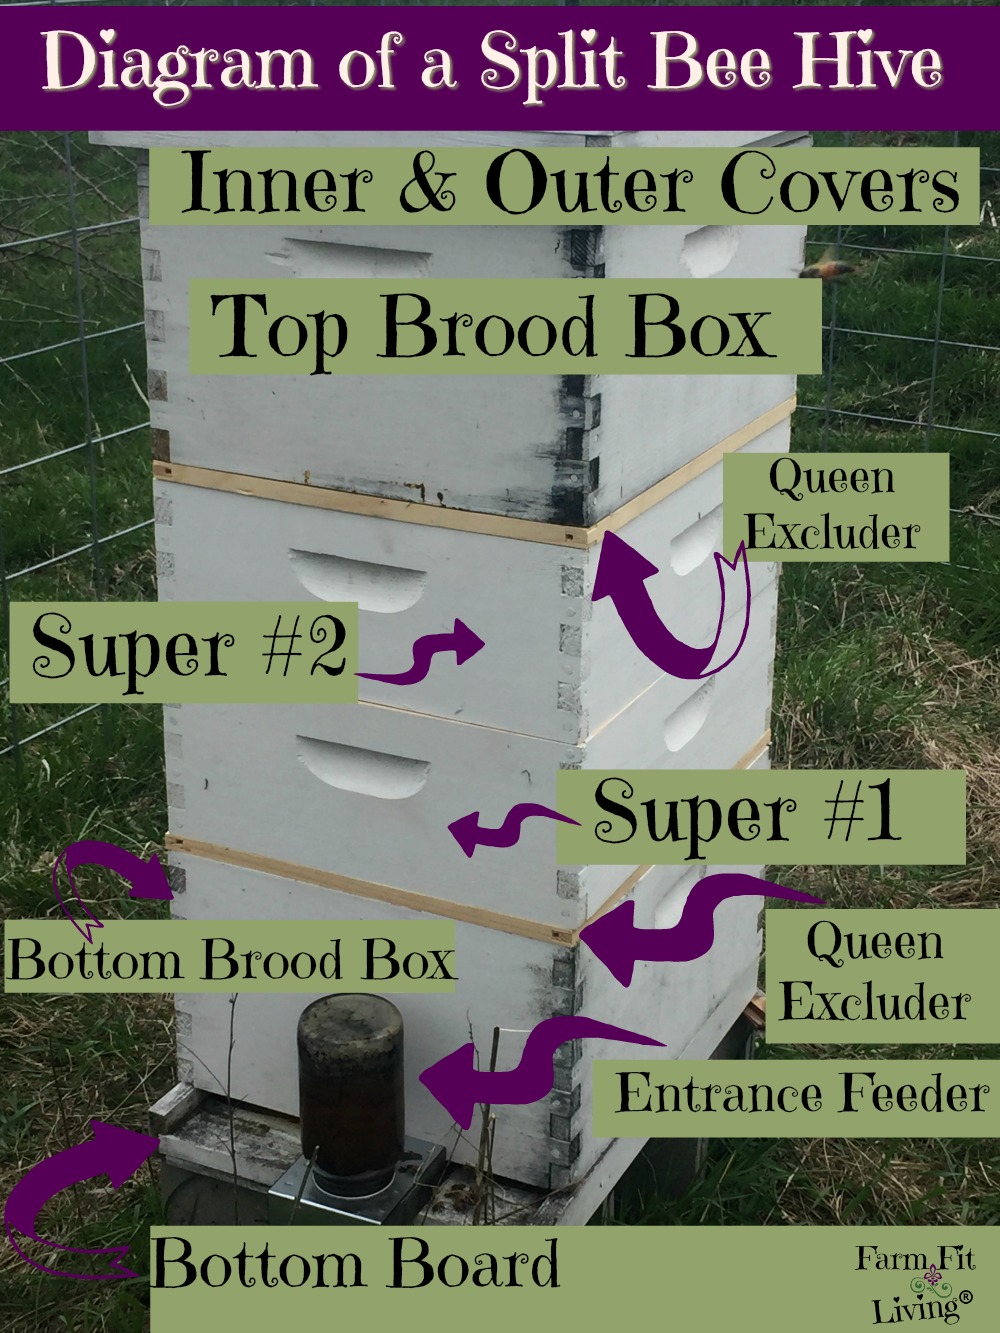
If so, then you can go ahead and split. Here's are the steps for splitting a hive to prevent swarming during the reversal:
- With the new bottom brood box in place, set a Queen Excluder on top.
- On top of the Queen Excluder, set a super box with frames.
- Next, another super box with frames.
- Then, another Queen Excluder.
- On top of that, set the original bottom brood chamber.
- Finally, cover with the inner cover and Outer cover. Be sure there's plenty of ventilation coming from the top.
And with that, you have two hives on top of each other! Check out the full diagram below to see the swarm control split. But what about the missing Queen in the top new hive? Here's what will (hopefully) happen.
Time Line of the Natural Queening
One of my mentors who has been keeping bees for many years advised this timeline to me as a guide. In the box with the Queen in it, she will continue to mate and lay eggs.
But, in the box without a Queen, new Queen brood will hatch. This takes place about 15 - 18 days after the hive is split. If you looked inside, you'd see a young Queen wandering around.
Then, a week later, she should be mated to a drone and ready to start laying eggs. There are a few advantages to natural Queening:
- Inexpensive
- Usually successful
- Few manipulations needed.
And one problem you might face:
- Queen may be inferior or mate with inferior drones.
If or when the process of natural queening is unsuccessful, there's another option.
No Natural Queen? Requeen The Hive with a Queen
The hive must have a queen to survive. No doubt about that.
After all that work of reversing, splitting and inspecting, there is hope for a queen even when no natural queen is made. You can buy a queen and requeen the hive.
So, how do you find queen bees for sale? Well, I usually work with my mentor and bee mastermind group to find quality Queen bees. You're going to spend around $40 for a Queen plus shipping.
Then, Check out my post for how to requeen a Queenless honeybee hive.
Beekeeping Resources I Recommend
You need a beekeeping mentor. Your mentor is invaluable to your success! The best resource by far!
Read 5 reasons why you need a good mentor.
And here's how you can find a mentor.
Next, here's some books I highly recommend for successful beekeeping. I referred to some of the techniques to further explain methods in this post.
- Beekeeping for Dummies
- The Beekeeper's Handbook
A Great Web Site for Beekeepers:
These resources will go into deep detail about all things beekeeping. Remember, the best way to learn is to actually get into the hive and observe. You can learn so much from the bees themselves if you just take the time to watch them.
So, What's Next?
Leave your bees alone while they process their new hive dynamics and (hopefully) natural requeening. Let them do their natural thing as much as possible. You can monitor the hive traffic as you're bringing them sugar syrup.
Yes, you want to continue to feed your bees sugar syrup. They will bring pollen into the hive and nectar, too. This season of Spring is an interesting time with new life inside the bee hive.
Check out my post about feeding packaged honey bees.
New life and more life. With the hives populating, bees can become congested and possibly begin to swarm. The technique described here may or may not be the best way to split a hive. But, it's definitely worth a shot.
So, as the seasons turn and the weather warms, prevent those swarms. Get into those hives and see what's going on. Finally, use the above technique to reverse and split hives to prepare for a long season of honey production by your hard working bees.
Did you enjoy this post about splitting bee hives in spring? Leave me a comment with your best tips for "how to split a bee hive" and your thoughts on "when is it too late to split a bee hive?"


One question: How do drones laid and hatching in the top brood box exit the brood box and hive through 2 queen excluders ?
Hey, Robert!
I had this question and concern as well when I first learned about this method from my bee chat group. It was explained to me that the bees can still get in and out through the excluders but the Queens can't. The main reason to use Queen excluders (and the only time I really use them) is to keep Queens from getting to one another. And the reason to leave boxes together was that the bees in the new split will still have a Queen in the bottom part to stick to so they won't leave the hive before the new queen hatches. I hope that answers your question. I have had good luck with this type of split - just make sure you see the new queen before you split up the boxes.
How does the new queen that hopefully hatches in the top box get out to mate & then get back in to the top box?
Robyn ~ Thank you for your clarifying question! I will update the post to reflect this more clearly. After Day 18, once the Queen is Hatched, remove the top hive with the (hopeful) new Queen and place it onto it's own bottom board. Then, you essentially have a brand new hive with an entrance for the Queen to leave the hive to mate. I hope this is clear. I will also be updating the post because my mentor has discovered a new way to split that he says is even better than this way. I'll be updating this post soon.